 |
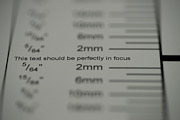
Lately I’ve been reading a lot about image sharpness and did some experiments. When I took my first pictures some 20 years ago on a pocket camera even a 10*15 cm print wasn’t sharp. Today my equipment has improved a lot and people are impressed by the 50*75cm and 70*100cm enlargements. |
I’m not, at least not always.
A sharp image is something else than applying (excessive) unsharp-mask in Photoshop. My <<<philosophy>>> is that the raw image should be AGAP (as great as possible). Yes, sharpening is required but only just before printing or publishing, and should be applied with care. This article provides my three step approach:
- Step 1 of this article describes the conclusions of my experiments to get the best in-camera image quality;
- Step 2 describes post-processing steps to convert a great capture to an even greater photo;
- Step 3 is intended to generate the final image based on it’s purpose.
This article describes a generic approach to taking sharp pictures. If you like this information, you might also like to read how to take a wildlife picture, or how to take a macro picture.
Step 1: Get the most out of your equipment
Several factors are important to achieve sharpness. I’m still experimenting with this. At this moment, my conclusions are
- Apply Stabilization techniques. My recommendation is, whenever possible, to use a beanbag (instead of a tripod). Beanbags rule!
- Shoot Digital (versus Analog);
- Use Modern and/or Expensive equipment;
- Shoot in RAW mode;
- Shoot at lower ISO ratings (use native image sensor sensitivity);
- Stop down the lens (usually 2 or 3 stops) by optionally compensating the ISO rating (for example from 100 to 400);
- Use Mirror lock-up;
- Use spot-focusing;
- Use cable release or (even better) remote release.
Note that several of these options include an implicit trade-off regarding compositional effects (for example the aperture setting which influences Depth-of-Field). Sometimes it is also a tradeoff between these factors, for example when stopping down the lens and lowering the ISO sensitivity, then you risk motion blur.
Step 2: convert a perfect capture to an even better picture
During capture stage (see step 1) it is important to get as many details in the RAW file as possible.
During post processing, we have several tools to improve the quality of the final output. There are several steps that you can take to improve the capture. The steps described below are based on my personal preferences.
I use photoshop and Adobe Camera Raw (ACR) to process my images. I use ACR to get all details into the frame and do some overall tonal adjustments. Then I use Photoshop to finetune the image.
As discussed in step 1, I shoot in RAW mode. This provides more control during post processing.
Activities in Adobe Camera Raw:
- Adjust the white balance;
- Apply minor exposure to retrieve blown-out highlights. This includes some overall recovery, brightness, contrast and clarity tweaking;
- No sharpening at this point;
- Some color noise reduction.
The purpose here is to spend a little time as possible in ACR. All corrections you apply in ACR (or any other raw processor) are to a certain degree destructive operations. Maybe I need to explain this. The changes made to white balance, clarity, noise reduction, exposure and all others are stored in XML files accompanying the RAW file. They can be changed on demand. However, when opening an image in Photoshop a copy is made based on the ACR settings. At that moment all settings are “burned” into the image and all you might loose details. Of course you can go back to the RAW file and reapply settings. However, this is somewhat cumbersome as you might loose all work done in Photoshop (for example cloning operations). So, in short, my strategy in ACR is to provide as many details from the original sensor data to Photoshop.
Photoshop is used for the detailed work. All operations are done in separate layers to make them non-destructive, in this order:
- Cloning out dust spots and minor annoyances (I do not clone out complete objects)
- Color correction (levels)
- Contrast correction (curves)
At this moment I’m done and save the file in PSD format.
Step 3: generate final images based on purpose
This step is my favorite. I have created several actions to convert the image from step 2 to versions that are suitable for printing (high resolution, high quality JPG), viewing on screen or iPad (a medium resolution, medium quality JPG) or publishing on my website (low resolution, high quality JPG using “save for web”).
Every action includes steps for sharpening the image.
As I can run the conversion as an batch process, I can process hundreds of images while having diner or watching a movie.


6 Responses
» WildestDreams Photography Photo-BLOG » Image sharpness: how to … Fotoblog says...
[…] Go here to read the rest: WildestDreams Photography Photo-BLOG » Image sharpness: how to … […]
This is my first time i visit here. I found so many useful stuff in your website especially its discussion, From the a lot of comments on your articles; I guess Im not the only one receiving the many satisfaction right here! keep up a good job;
Greetings I found your blog by mistake when i searched Google for this concern, I have to express your website is truly useful I also love the layout, its great!
F*ckinˇ¦ remarkable issues here. I am very happy to peer your article. Thanks so much and i am having a look ahead to contact you. Will you kindly drop me a mail?
Sup , I am making a site like ehow and some of your original articles would really fit in well. Would you let me link back to your article?
Please do!
Thanks.