WDS Scan App - Image Processing application


Follow me:


WildestDreams FS4000US Scan Application
Help page for the WDS Scan Application: Image Processing Application (WDS-IP)
|
This application allows the user to perform Scratch & Dust removal on scanned images and some additional finetuning to the image. This page will guide you thru the workflow to finetune your picture. |
IMPORTANT
|
1. Please, never judge colors of scans in WDS-IP, the image will look washed-out. The image presented by WDS-IP is displayed in 256 colors only. Therefore the picture will not look acurate at all. Further down this page is the same image as used in this example displayed using photoshop...a big difference. 2. WDS-IP gives you lots of possibilities to alter your images. Be sure to use the WDS options only for the best results. Using any other option will manipulate the image in 24 bits, the options from the WDS-menu are in 42 bit. Other options can be used but are, however, the results are unpredictable (ranging from good effects to total dumps). |
STEP 1: Load an image.
|
You can use the File-Open option to load an image. Only files with an
extension of *.wds should be opened.
You can also associate the *.WDS filetype to WDS-IP so that you can double-click such a file to open it. |
STEP 2: Defaults.
|
After selecting a WDS image file, next dialog will be presented: |

|
The "Gamma" value will be applied to the Image. It might be wise to set
this to 1 and do gamma correction yourself using the Levels Tool in Photoshop.
The other fields probably needs some explanation :-)
|
|
The FS4000US has a sensor for Red, Green and Blue. These sensors are physically located next to each other. When the scanner gets a sample at 2000 DPI, it gets the Red from position [x,y], Green from [x+8,y] and Blue from [x+16,y]. To get the correct image, the Green plane has to be translated 8 pixels to the left, and the Blue plane has to be translated 16 pixels to the left. To see this behaviour you can cancel out of the Defaults screen and look at the image. It seems very blurry. Most likely the defaults are OK for you, it's easy to find out. Best is to use a slide with a lot of greyish colors and scan at all 500, 1000, 2000 and 4000 DPI. Open the image in WDS and see if the image has excessive colors on edges. An example of standard FilmGet is given below (the image is a window of a house, zoomed in at 400 percent): 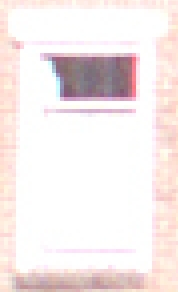
As you can see this image contains too much BLUE on the left side and too much RED on the right side (best seen at the dark rectangle on the top). This implicates a misalignment in the RED channel. Here is the same window scanned with WDS: 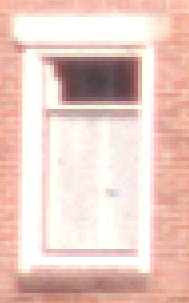
WDS-IP solves this misalignment using the offsets presented in the Defaults dialog. Note that on 2000 DPI this already gives a significantly better result. Scanning at 4000 DPI and then downsampling in Photoshop gives the best results. This allows you to enter a more precise alignment offset. |
STEP 2.2: IR offsets and contrast
|
WDS-IP allows you to view the infrared scan from the FS4000US, displayed as a
greyscale image. The infrared scan from the FS4000US does not show much detail.
WDS-IP allows you to add contrast to the infrared scan to see the details. The
scan is in 16 bits (range [0
65535]). The infrared sample is reduced with the
amount specified in "IR Translate". Then the value is multiplied with
a factor presented in "IR Scale". In the example above, the contrast will
be a factor 5 higher. If a scanned value (after correction) has a value lower
that specified in "IR Holder Threshold", then WDS will treat this as the
sliderholder.
You can experiment with these values, however please notice that the scratch and dust detection algorithm (described below) depends on the amount of contrast added. |
| After pressing OK on the Defaults dialog, the image will be loaded and shown. In the background the allignment and changes to the IR image are processed. Progress is given in the statusbar at the bottom of WDS-IP. |

|
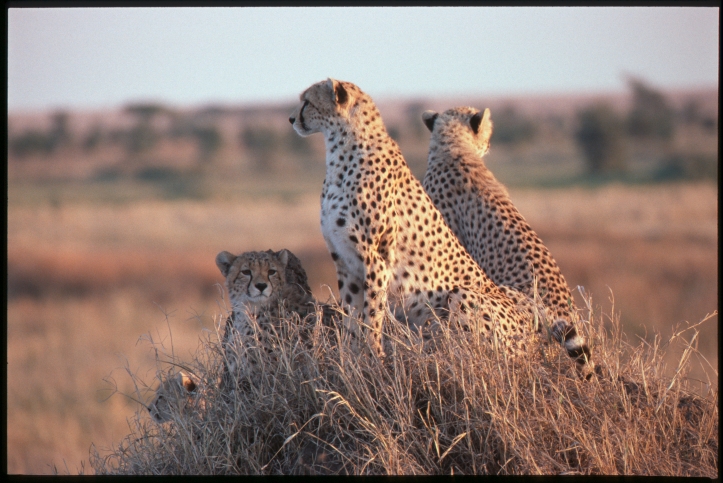
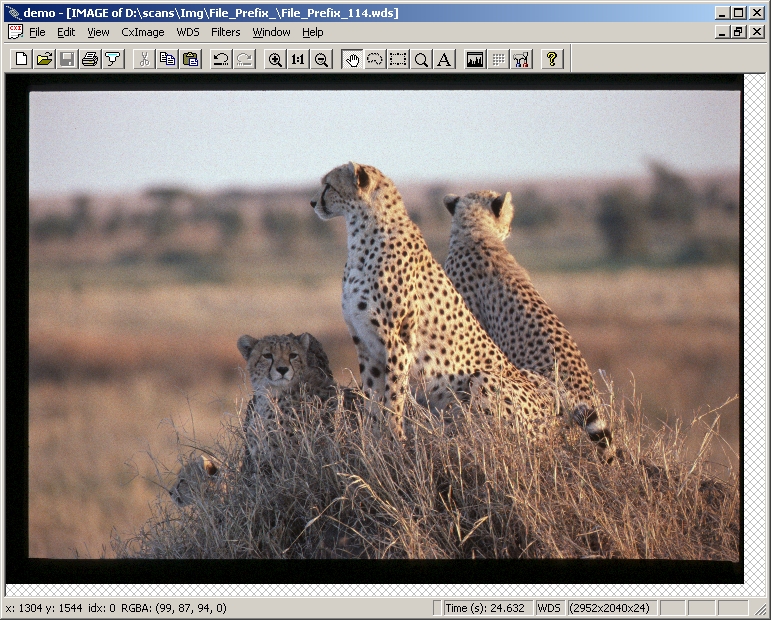
Opening an image also opens its associated Infrared scan.
An example is given below.
|
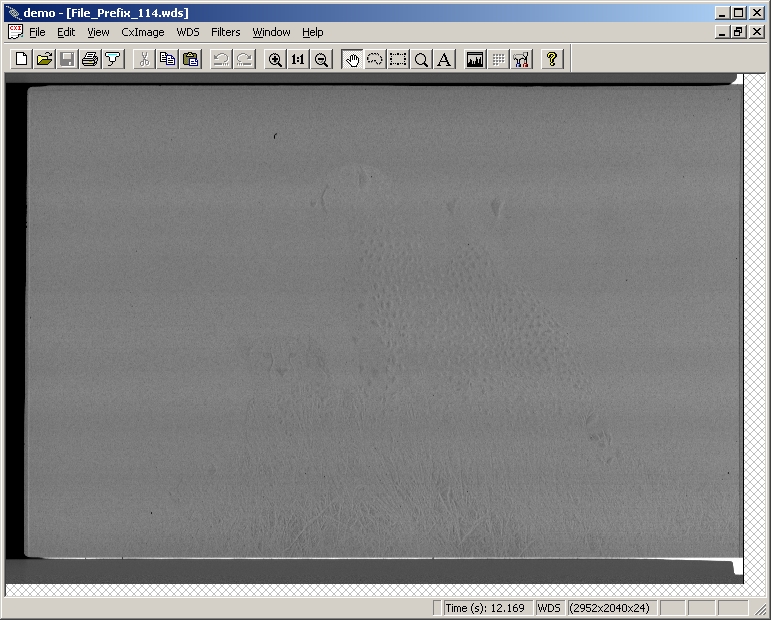
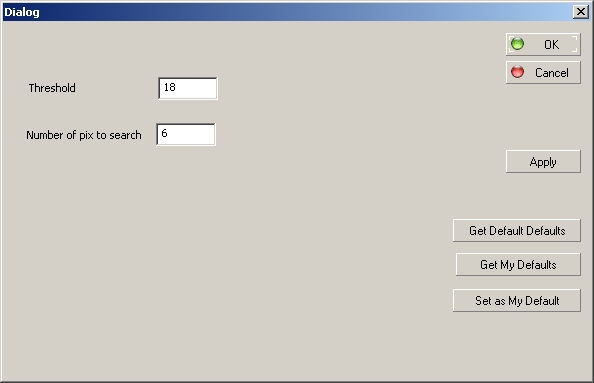
STEP 4: Scratch and Dust detection.
|
The image above is the infrared image visualised in grayscale.
Difficulty in this image is that there is a dustspot on the top-left of
mother-cheetah, which should be removed. Other dark spots, such as the eyes
of the cub or the nose and spotted-pattern of the cheetahs should remain.
Click menu-option WDS - Scratch & Dust Detect. Next dialog will be presented: |
|
WDS-IP uses the Infrared scan to detect scratches and dust. Any pixel will
be compared with pixels in the neighbourhood (the area to search for is
indicated by "Number of pix to search"). When the difference is
above a certain "Threshold"
then the pixel is marked as dust (pure red on the image, black on the infrared image).
Result of the Scratch and Dust detection process is shown in next screendump: |

STEP 5: Inpaint.
|
This option does not take any user interaction. The result is that all pixels
that were marked by the Scratch and Dust detection algorithm get replaced with
a new pixel that blends nicely in the picture. This process is called inpaiting.
Result of the image after inpainting is: |
STEP 6: Save 48 bits image.
The last option from WDS-IP is the save dialog (Use
menu-item "WDS - Save 48 bit tiff").
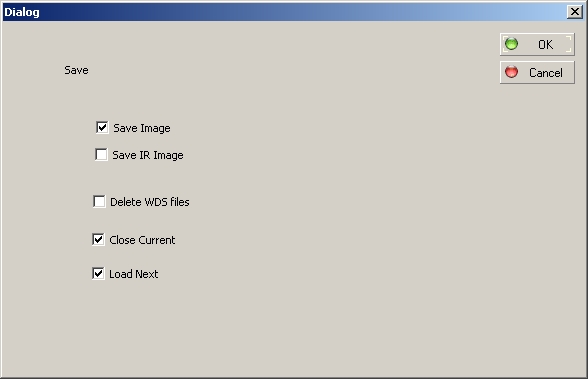
This dialog allows you to save a 48-bit TIFF for the image and/or infrared image, delete the WDS files, close current image and load next image. |
STEP 7: Open image in Photoshop for further processing.
|
After the TIFF is saved you can open it in Photoshop. This is the result
after inpaiting and note the difference in colors, compared to the
result of WDS-IP. This is a raw scan from WDS, no image correction applied yet!
|